
Creating a free website is easy, said no web developer ever. But we are saying it today. And we aren’t just saying it; we are going to show you how to do it.
In less than 2 hours, you can get a beautiful and fully-functional website for free.
All you have to do is read this simple, no-fluff guide on creating a website from scratch and practically use what you learn.
Step 1: Get the Prerequisites in Place
Table of Contents
- Step 1: Get the Prerequisites in Place
- Step 2: The Setup: Installing WordPress.org
- Step 3: Designing and Customization: Making your Website Truly Your Own
- Step 4: Configuring the Site: Adding Widgets and Plugins for Functionality
- Step 5: Advanced Settings: Starting an eCommerce Storefront (Optional)
- Step 6: Pre-Launch Checklist
1.1. Finding the right Website Builder
The first thing you need to get started with is a content management system (CMS). Now, there are a lot of free website builders that you can choose from. Most builders initially offer a free plan, but later, you feel the need to upgrade to premium plans. This is because, as your website grows, the free version fails to keep up with your needs.
WordPress.org is one of the most popular, widely used, and feature-loaded CMS.
The best part is that it is free forever. Therefore, WordPress is the best software to create a free website in 2021.
1.2. Domain Name
Before you set up your website, you need a domain name. It is the address of your website on the web and is visible in the URL bar. You can buy domain names online for $10 to $50.
If you have a business website, the ideal domain name would be – YourBusinessName.com.
For personal websites, you can go for – YourName.com.
Depending on what audience you want to target, you can get a domain name with .com, .edu, .org, .net, and other suffixes. For location-specific websites, you can go with .in, .fr, .ru, etc., depending on the country you want to target.
Also, we have a simple way to get a free domain name for a year, so keep reading.
1.3. WordPress Hosting
A hosting service provider ensures that the website that you have created with your website maker is always accessible to the public.
There are many hosting service providers for WordPress. And you can find plans starting for as little as $2.5/month.
A good hosting provider will offer the following features-
- Free SSL certificate
- One-click WordPress installation
- Regular backups
- 24/7 support
- Free domain registration for a year (That’s how you can get a free domain name for a year with a good host!)
Once you have selected a WordPress hosting partner, you can log in to your account’s C-Panel.
Step 2: The Setup: Installing WordPress.org
In your hosting account’s C-Panel, you’ll see an Install WordPress option. It varies where the button is located depending on the host you have selected.
When you click on that button, you will be asked to provide a few preliminary details about your website. When you are done, you will get a login id and password for your WordPress backend. Keep the login details safe so that you don’t accidentally get locked out of your own site.
If your host does not offer one-click WordPress installation, you can read this quick guide for manual installation.
Step 3: Designing and Customization: Making your Website Truly Your Own
When you have logged in to your WordPress backend, it is time to customize your website. Depending on how unique and customized a website you need, you can spend as much or as little time on this step.
You can start the customization process by installing a theme.
1. Visit the Themes section in the menu on the left-hand side.
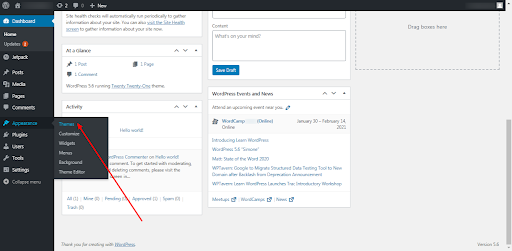
2. Go to the free themes options. And select the one that suits your needs.
3. Click install and then activate the theme.
4. Once your theme has been applied to the website, you can customize it as you want. After you have adjusted the theme, you can add content to your site.
5. If you want to create pages, select Pages → Add new. Home, About, Contact, Blog home page, and Services/Products (optional) are a few pages you must add to your website.
6. And if you want to add posts to your site, you can select Post → Add new. This option will add pages to your blog.
Adding content to your pages or posts is very easy with the latest Gutenberg editor. If you are not comfortable using the editor, you can install and activate the Classic Editor Plugin or other content editors like Elementor or Divi.
Some other site settings that you should do include –
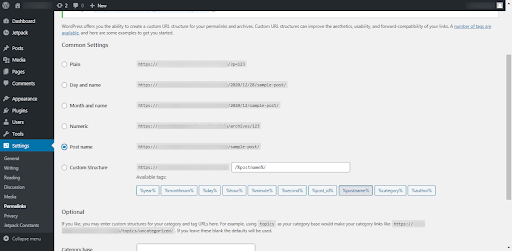
1. Setting a permalink structure.
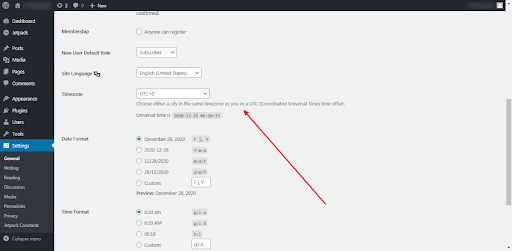
2. Setting the time zone for your website.
3. Setting the favicon and logo. To edit the favicon, go to the themes section → Click on the Customize option on your theme→ Site Identity
![]()
4. Add a navigation menu.

You can go to the menu option to create a navigation menu. You can either use Option 1 and create a menu from the backend or go to the live preview (Option 2) and edit it from the frontend.
5. Add images and multimedia content.
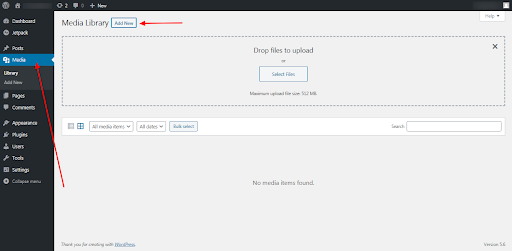
You can media items directly on the pages where they are used or upload images and videos in the Media section.
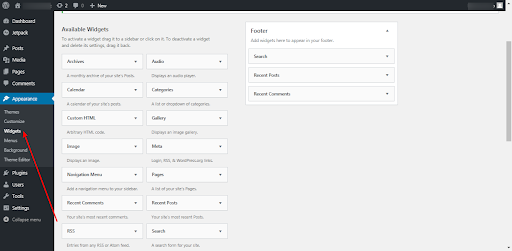
Step 4: Configuring the Site: Adding Widgets and Plugins for Functionality
WordPress comes with a lot of in-built features. And a lot more features can be added in the form of widgets and plugins.
What widgets and plugins you should install depend on your website and what functionality you need.
Go to the Widgets option in the Appearance category and select the widgets that you want on your site.
You can also explore the Plugins sections to find a lot of free options.
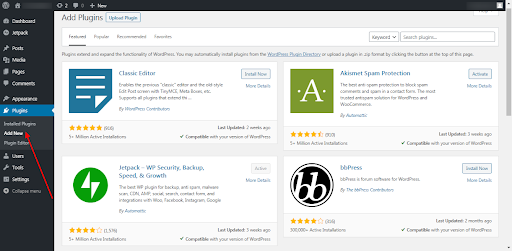
Some basic plugins that you should have on your website (and how to use them)-
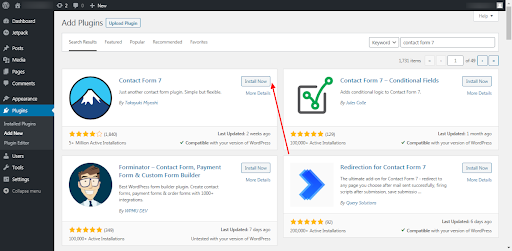
1. Contact Form 7 for contact forms.
2. Yoast SEO for Search Console integration and sitewide SEO.
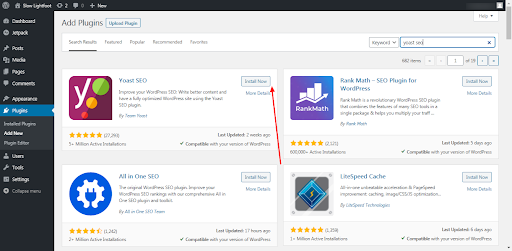
With the Yoast plugin, you can set meta title and meta tags, canonical tag (to avoid duplicate indexing in search engines), also get SEO score that will help you create a search engine friendly website.
3. Monster Insights for Google Analytics Integration.
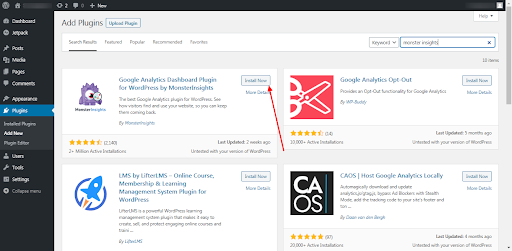
With Monster Insights, you get integrated Google Analytics settings on your WordPress dashboard. You can use this plugin to keep track of your website statistics and improve metrics.
Once you have installed and activated the plugins that you need, you can manage them from the Installed Plugins section under the ‘Plugins’ category.
If you want a basic website, your work is done, and your website is ready for use. And you can skip straight to Step 6.
However, if you want to set up an online storefront on your WordPress website, keep reading
Step 5: Advanced Settings: Starting an eCommerce Storefront (Optional)
Setting up an eCommerce store is a quick and simple way to earn through your website. And when you are creating a WordPress website, setting up a storefront is as simple as installing a plugin.
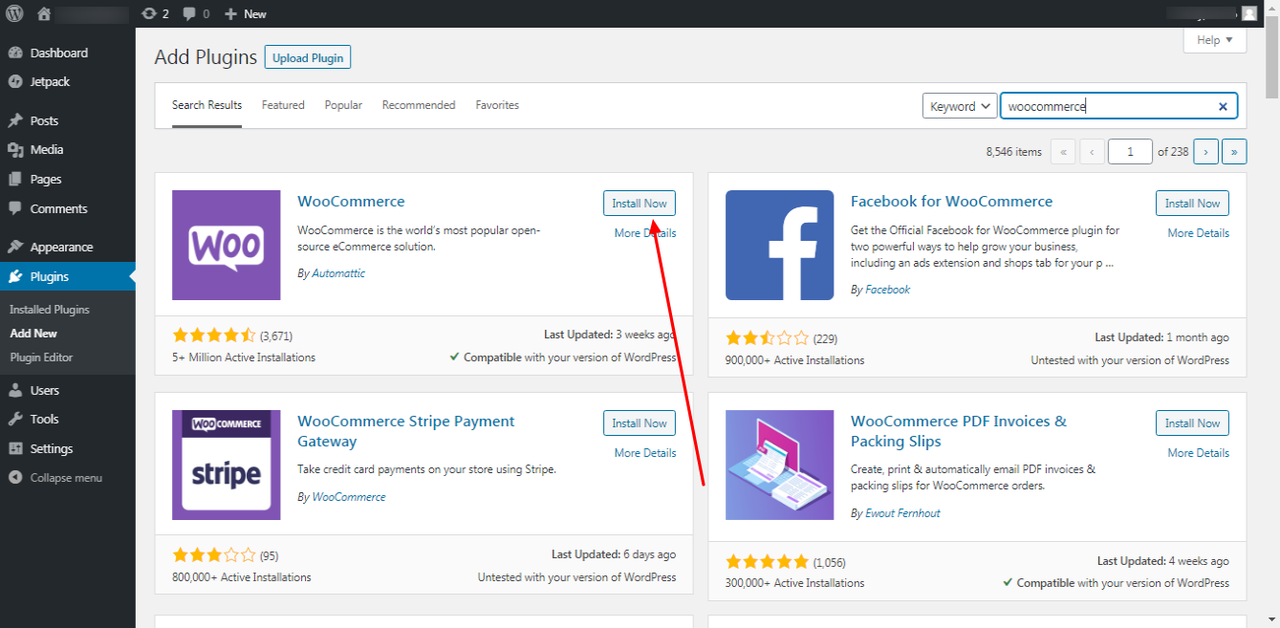
WooCommerce is the most popular and the best eCommerce plugins for WordPress.
All you have to do is look for the WooCommerce plugin, install and activate it, and get started.
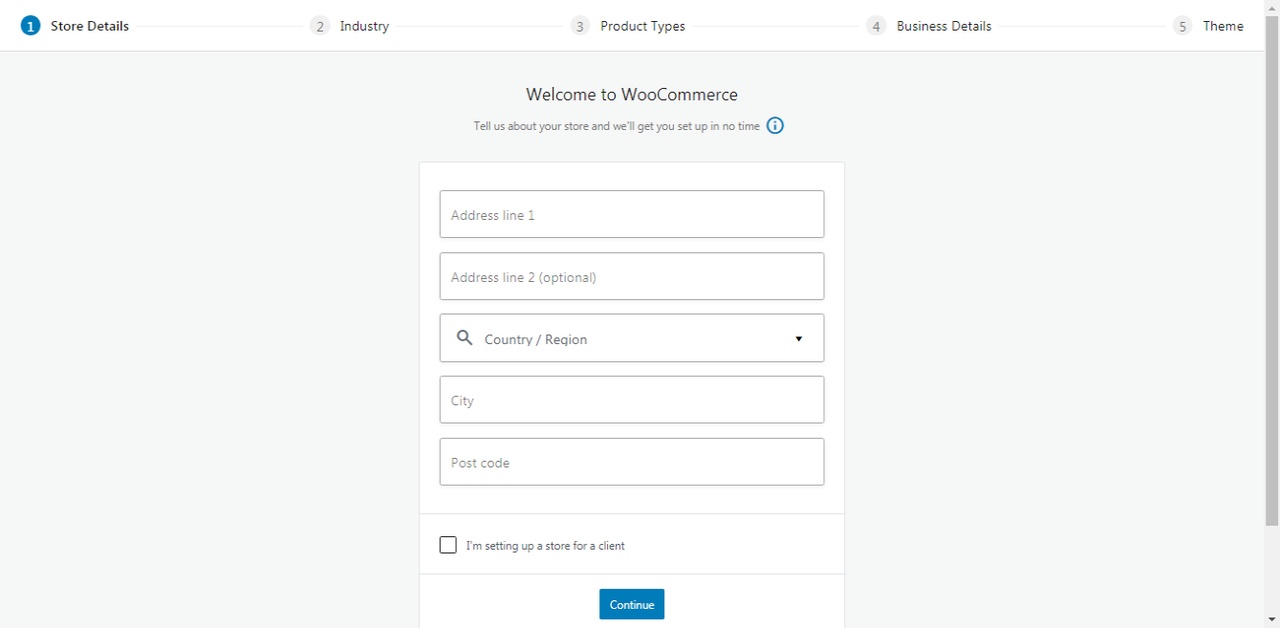
When you click Activate, you will be taken to the settings page where you have to enter the business details.
It will integrate the storefront to your website, and you can accept payment through PayPal.
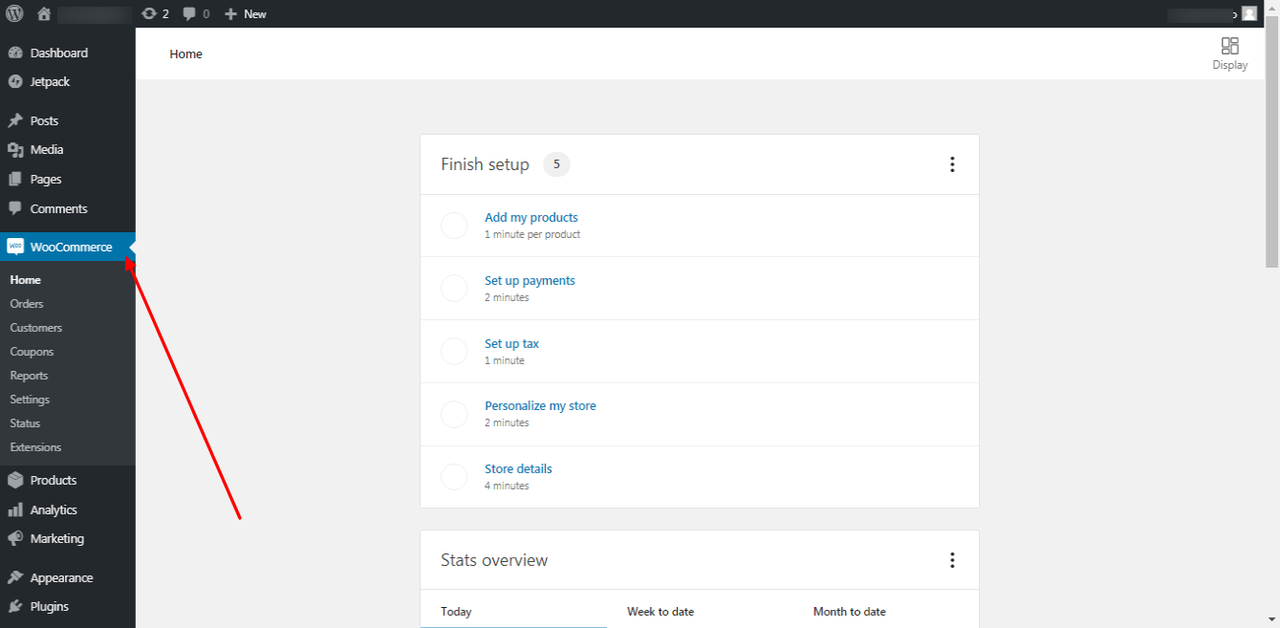
You can further customize your store, add products, set up payment and taxation details, and manage your online store by clicking on the WooCommerce option in the left-hand side menu.
After installing the plugin, you will see that a few new pages have been created. These pages are ‘Shop/Products,’ ‘Cart,’ ‘Checkout’, and ‘My Account’.
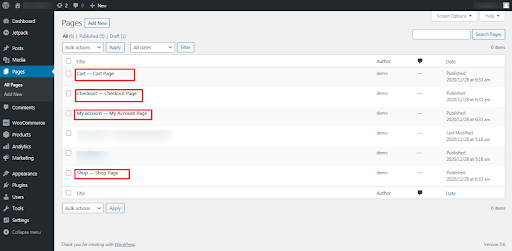
The pages are similar to the other pages on the website and can be edited and designed as per your needs.
The only thing that you need to ensure is that your theme should be compatible with WordPress. However, you won’t find it difficult to find such themes as most of the options are optimized for eCommerce as well.
Step 6: Pre-Launch Checklist
Once your website is ready for launch, here is a checklist to help you make sure you don’t miss anything.
- Spelling and grammar check across your website.
- Make sure your website has original content.
- Check if all the images are loading correctly and have alt tags.
- Make sure your website loads fast. You can check the page load speed with Google Pagespeed Insights and GTmetrix.
- Make sure your website is mobile optimized. You can use the Mobile-Friendly Check to find out.
- Test if all the links on your website are opening correctly or not. If you have external links on your website, make sure they open in another tab.
- Make sure your website is compatible with all browsers. You can check browser compatibility using the Browsershots tool.
With the best free website builders like WordPress by your side, you can easily create your own website.
Now that you know what needs to be done and how it is time to practically use what you have learned and create a website for your personal or business use.

No Comments