If you have been in the scene of video editing within the last three or four years, chances are that you may have used Windows Movie Maker for a few video editing projects.
This free software, found in Microsoft Windows PCs, was not perfect, but it was simple and efficient for both basic and slightly complex projects.
However, for some unknown reasons, Microsoft announced that their famed video editor would cease to exist!
With this news already known, everyone is in search of the best alternative to Windows Movie Maker.
Today, I will briefly discuss why Microsoft’s new video editor is not a worthy replacement and how another video editor has caught my attention.
What is wrong with Microsoft’s New Video Editor?
Table of Contents
When Microsoft announced that they would be removing WVM, they did announce that they would send a replacement immediately. This replacement is referred to as Photos, Microsoft’s AI-powered movie maker.
From my experience with the software, it does automatically create slideshows for you using your pictures, video clips, and a random music clip. But more often than not, you’d have to either hit the remix button or make changes manually to suit your taste!
Also, I found that Photos has no transition effects, which is supposed to be among the basic features of a ‘modern’ movie maker!
At this point, I’d say that you can feel free to use Photos, if you’re making very simple videos or slideshows. Other than that, chances are you won’t get any ‘mind-blowing’ results with it.
Scanning Microsoft Store…
What is the Best Alternative to Windows Movie Maker?

Just like everyone else, I scoured the web for worthy alternative to Windows Movie Maker. I wasted my time trying a few video editors that just freaked me out! But my search hit a pause when I came across a specific movie maker in Microsoft Store.
With over 40k reviews and a star rating of 4.7, my attention was drawn to Animotica when I had used Microsoft Store’s search feature.
I’d realized that, for the term ‘movie maker,’ Animotica was on top of the list, with more reviews and better rating. So, I decided to try it.
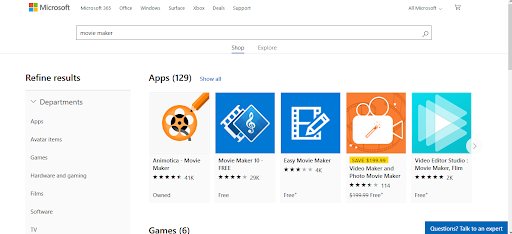
(I did notice that, while the review score remains the same, the number of reviews might vary according to location. Also, you might get a different app list from this search term, but Animotica always shows up top.)
A little more research about the software revealed that it has been translated into 17 languages, with over 3 million downloads since its release in 2017.
This does explain why it ranks as the number 1 alternative to WVM.
Animotica is, indeed, not just the run-of-the-mill movie maker that allows you to throw in a bunch of video and photo clips with music and minimal effects. It stands as a full-fledged video editor with essential tools and features that you can use to cut, merge, filter, fade, watermark, and much more.
Along with the basic tools of the defunct WVM, Animotica has over 40 transition effects, which make your clips progress with elegance. Its overlays tool fallows you to add stickers, GIFs, images, and even videos on top of your chosen clip.
Animotica’s Chroma Key tool allows you to pull-off cool green-screen effects just like they do in your favorite Hollywood movies! You can also use its pan and zoom features to achieve the Ken Burns effect when making documentary-style videos or imitating a drone shot!
All these may sound a bit technical, but because Animotica is so easy to use, you can learn to make really cool videos with these features in a relatively short time.
How to Edit Videos in Windows 10

Here’s a little practical session to demonstrate how to edit videos in Windows 10 using Animotica. Whether you’re creating video content for Ads or just making a video of fun moments you just had during a vacation, editing with Animotica is a cakewalk.
Let’s proceed.
Step 1: Install and Launch the App
Animotica can be installed for free from Microsoft Store using this link. Once you’ve downloaded it, launch the app and click on New Project.
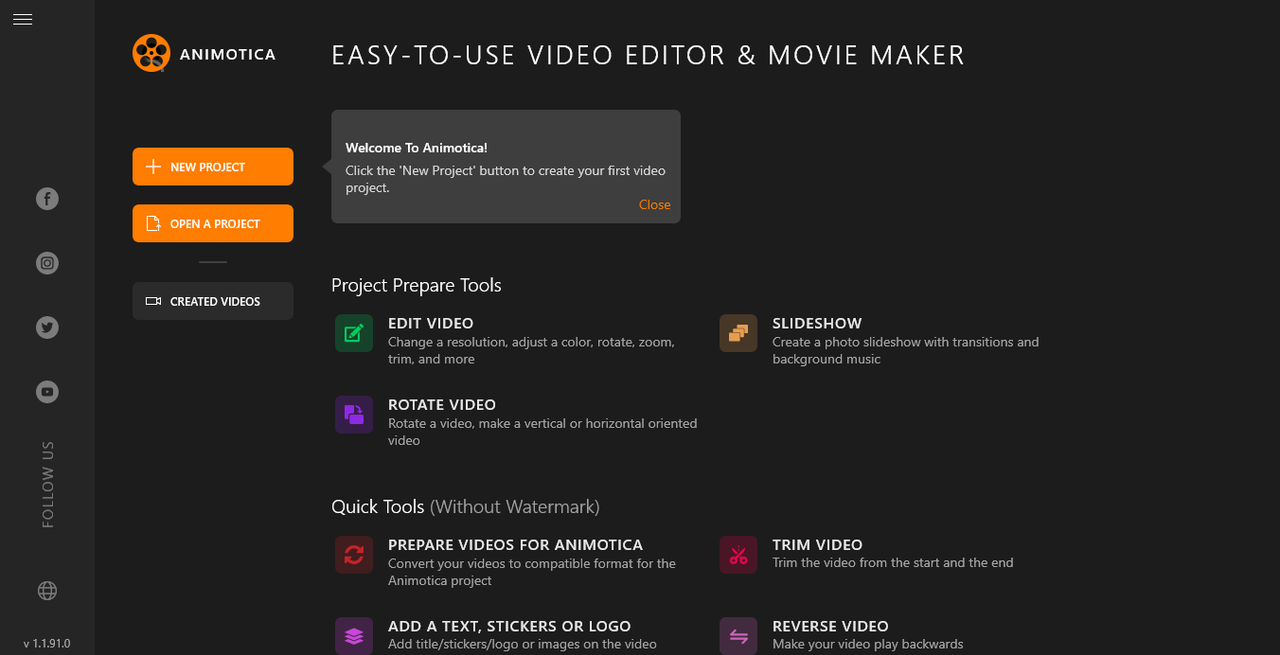
Step 2: Upload your Files
When you click on New Project, you should be taken to a blank ‘project window.’ Click on Add Video/Photo Clips.
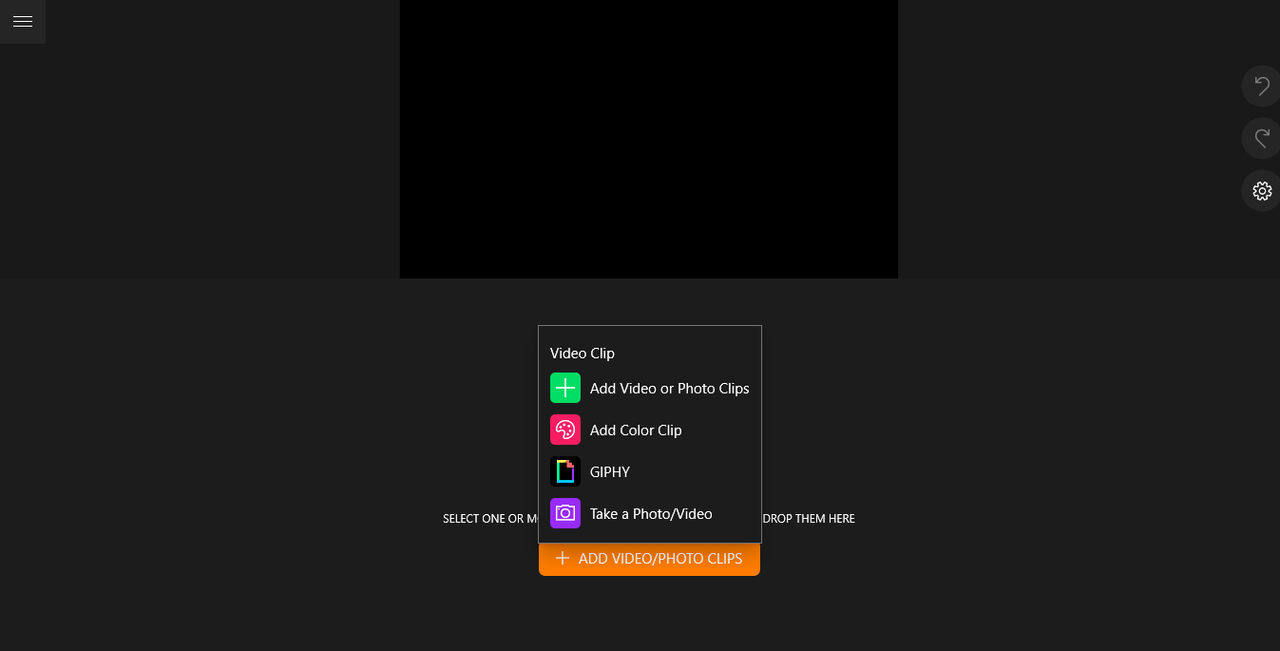
You will be taken to your storage area. Navigate to where you’ve stored your clips, select them and hit Open.
Step 3: Edit your Clips
Here, there are several things you can do to give your video the flair you want: dramatic, comic, horrific, etc.!
You can trim, flip, fade, add overlays, background music, transition, motion, and much more.
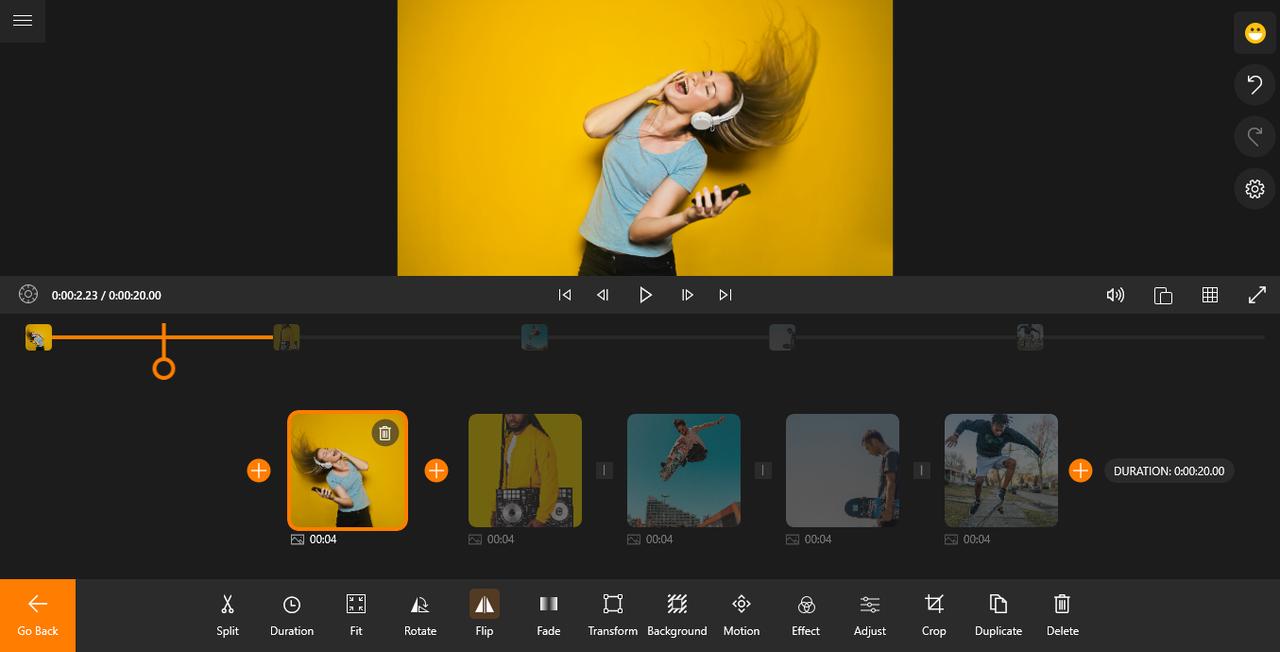
Here’s a list of features you can try out.
Feel free to play around to discover amazing stuff you can use. If you make a mistake, Ctrl+Z is always your loyal friend!
Step 4: Save your Finished Project
Once you’re done editing, you can go on and save it. Simply hit Save Video. Feel free to leave everything else at the default setting because Animotica automatically chooses the best balance between size and quality.
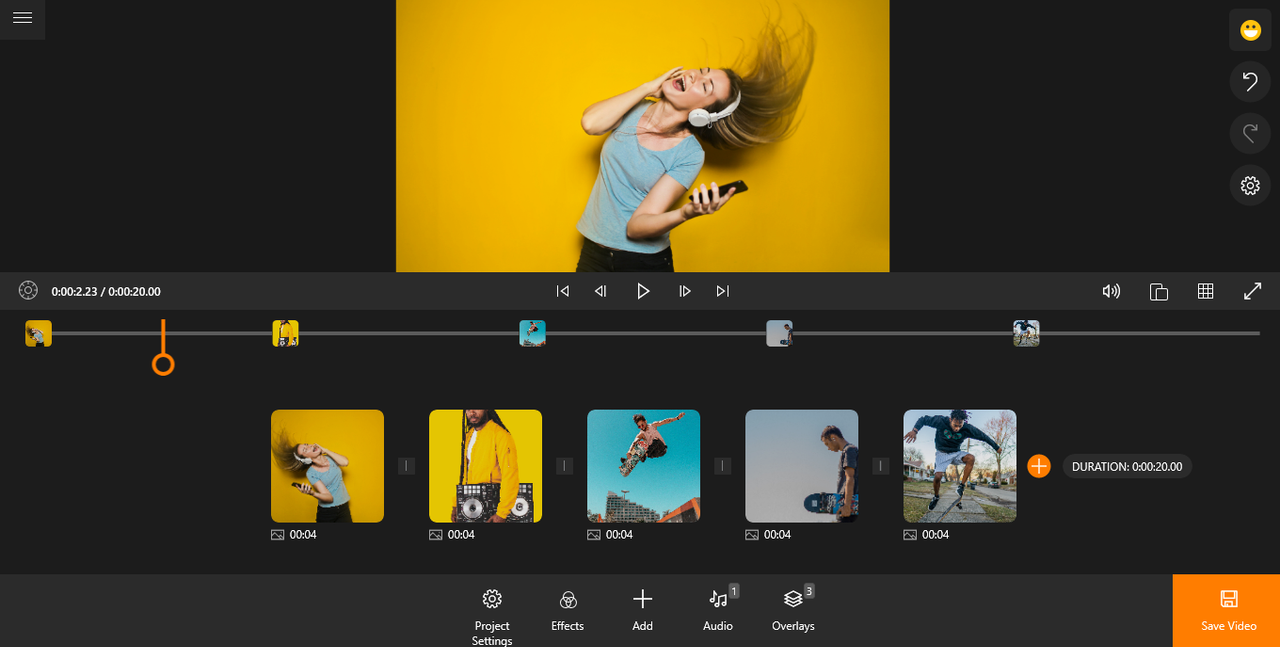
Hit Save As, and after inputting your file name, hit Save.
At this point, you can just allow a few minutes for the software to export your video.
Once the exporting has completed, you can choose to upload directly to YouTube or just view it in its folder.

You’re done!
Pricing: Is Animotica Really Free?
Animotica stands as a top alternative to WVM because it is easy-to-use and has extra features. But just like WVM, is this video editing software completely free to use?
Animotica movie maker is basically free. However, there will be a watermark on all videos created with the free version. Also, some advanced features will be restricted.
You can pay a one-time fee to get a full PRO license, which gives you a lifetime access to its full features. Furthermore, I saw on the website that full PRO is completely free for schools.
Conclusion
Nobody wants a replacement that has lower qualities than the original! That is why I quit using Microsoft Photos altogether and searched for something more flexible.
If you find Animotica as impressive as I did, be sure to drop a comment and share with your pals!
- How To Create A Safe And Comfortable Home Environment For In-Home Care In Boca Raton? - July 16, 2024
- 10 Trendy Black Nail Ideas To Elevate Your Nail Game - May 6, 2024
- Getting A Free Divorce In Virginia? Here’s What To Expect - April 24, 2024




No Comments